

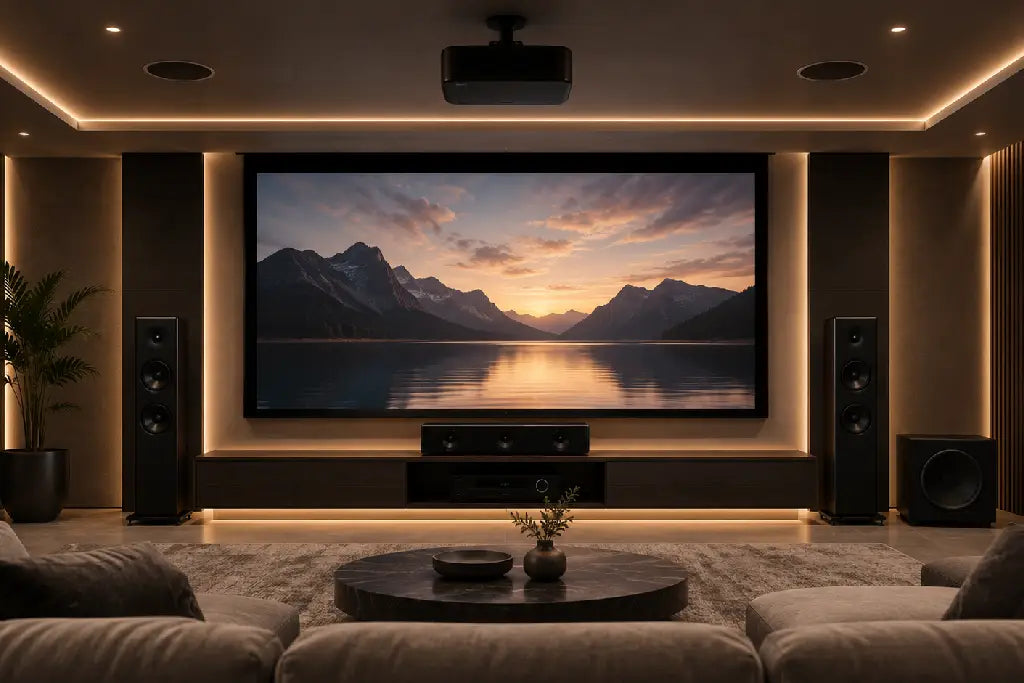
How to Set Up a Home Theatre System: Complete Step-by-Step Guide
Setting up a home theatre system can feel overwhelming - especially when you are looking at a room full of equipment, cables, and speaker stands with no clear starting point.
The good news is that the process follows a logical sequence. Done correctly, a home theatre setup is not complicated. It is just a series of decisions made in the right order: room, equipment, placement, connection, calibration.
This guide covers the complete home theater setup process from choosing your room to running your first calibration - step by step, in plain language.
Step 1 - Choose and Prepare Your Room
The room you choose has a bigger impact on your final sound quality than almost any piece of equipment you buy. A well-treated average room will outperform a great system in a poorly designed space.
What to look for in a home theatre room:
-
Rectangular rooms work best - square rooms create standing waves that cause bass buildup at certain frequencies
-
Soft furnishings absorb unwanted reflections - rugs, sofas, curtains, and bookshelves all help
-
Avoid rooms with large glass surfaces on multiple walls - glass is highly reflective and creates harsh echoes.
-
Windows can be covered with thick curtains or blackout blinds for both acoustic and visual benefit
Room size guidelines:
|
Room Size |
Recommended Setup |
|
Under 150 sq ft |
2.1 stereo or 5.1 compact systems |
|
150-300 sq ft |
5.1 or 7.1 surround system |
|
300-500 sq ft |
7.1 or 7.1.2 Dolby Atmos system |
|
Above 500 sq ft |
7.1.4 or larger Dolby Atmos home theater setup |
Step 2 - Choose Your Equipment
A complete home theatre audio system consists of several components. Understanding what each does will help you make better purchasing decisions.
The AV Receiver - The Core of Your System
The AV receiver (or home theater audio receiver) is the central component that decodes your audio, amplifies it, and sends it to your speakers. It also handles all your HDMI connections - your TV, projector, Blu-ray player, streaming device, and gaming console all connect through the receiver.
When choosing a home theater audio receiver, look for:
-
Enough channels to support your speaker layout (5.1, 7.1, or 7.1.4 for Dolby Atmos)
-
HDMI 2.1 support for 4K/120Hz and 8K passthrough
-
Dolby Atmos and DTS:X decoding for a Dolby Atmos home theater system
-
Audyssey or similar room calibration system
-
HEOS, AirPlay 2, or similar for wireless music streaming
Speakers
Your speaker layout determines the number of channels you need. The standard layouts are:
-
2.0 - Left and right stereo only (no subwoofer, no centre)
-
2.1 - Left, right, and subwoofer
-
5.1 - Left, centre, right, two surround speakers, one subwoofer
-
7.1 - Adds two rear surround speakers to the 5.1 layout
-
7.1.2 - Adds two ceiling or upward-firing Atmos speakers for height audio
-
7.1.4 - Full Dolby Atmos home theater system with four height channels
Display
Your display - TV or projector - should match the capability of your source content. For the best sound system for a home theater experience:
-
Choose a TV or projector with HDMI ARC or eARC for audio return to your receiver
-
4K resolution with HDR support is now standard for premium setups
-
Projectors are ideal for dedicated rooms where ambient light can be controlled
Source Devices
Common source devices for a home theatre include a 4K Blu-ray player, streaming stick or player, gaming console, and cable or satellite set-top box. All of these connect to your AV receiver, not directly to your TV.
Step 3 - Plan Your Speaker Placement
Speaker placement is where most home theatre setups go wrong. Before mounting anything or running any cables, map out your speaker positions.
Front Speakers (Left and Right)
Position your front left and right speakers to form an equilateral triangle with your main listening position. If you sit 3 metres from the screen, the front speakers should be approximately 3 metres apart. Angle them inward (toe them in) toward the listening position by 15 to 30 degrees.
Floorstanding speakers sit on the floor at this position. Bookshelf speakers should be placed on stands so the tweeter is at seated ear level - typically 90 to 100 cm from the floor.
Centre Speaker
The centre speaker goes directly above or below your TV or screen, as close to the screen as possible. It handles dialogue and on-screen action, so accurate placement is important. The tweeter should be as close to the screen's vertical centre as practically possible.
Surround Speakers
In a 5.1 system, surround speakers go to the left and right of the listening position, approximately 90 to 110 degrees off-axis, at seated ear height or slightly above. In a 7.1 system, rear surround speakers go behind and slightly above the listening position.
Height Speakers (Atmos)
For a Dolby Atmos home theater system, ceiling-mounted height speakers go approximately 30 to 45 degrees above the front speakers' position. If ceiling mounting is not possible, upward-firing Atmos modules can be placed on top of your front speakers - though ceiling mounting always delivers superior height imaging.
Subwoofer
The subwoofer is the most flexible component in terms of placement. Bass frequencies are largely omnidirectional, so the subwoofer does not need to be positioned as precisely as other speakers. Common starting positions include the front corner of the room or alongside one of the front speakers. Avoid placing it directly in a corner if you find the bass sounds excessive.
Step 4 - Run Your Cables
Before connecting your system, plan your cable routing. Nothing ruins a clean installation more than visible cables running across the floor or walls.
Cable planning tips:
-
Run speaker cables along skirting boards and under rugs where possible
-
Use cable conduit or trunking for a cleaner look if wall channels are not possible
-
For ceiling speakers, cables will need to run inside the ceiling cavity or through cable trunking
-
Label every cable before you start connecting - you will thank yourself later
Cable types you will need:
-
Speaker cables - connect the AV receiver to each speaker
-
HDMI cables (Ultra High Speed, 48Gbps rated for 4K and 8K sources) - connect all source devices to the receiver, and receiver to TV or projector
-
Subwoofer cable (RCA) - connects receiver's subwoofer output to the subwoofer's input
-
Optical or HDMI ARC - if your TV needs to send audio back to the receiver (for apps like Netflix running on the TV itself)
Step 5 - Connect Your System
Now connect everything in this order:
1. Connect speakers to the AV receiver
Use the speaker terminals on the back of the receiver. Match polarity carefully - positive (red) to positive and negative (black) to negative on both the receiver and each speaker. Incorrect polarity causes the speakers to work against each other, reducing bass and imaging quality.
2. Connect source devices to the AV receiver via HDMI
Plug your 4K Blu-ray player, streaming device, and gaming console into the HDMI inputs on the receiver.
3. Connect the AV receiver to your TV or projector via HDMI
Use the HDMI output (labeled Monitor Out or HDMI Out) on the receiver and connect to your TV or projector's HDMI input.
4. Connect the subwoofer
Run an RCA subwoofer cable from the Sub Out port on the receiver to the LFE or line in input on the subwoofer. Switch the subwoofer's crossover to its minimum setting - the receiver will handle crossover management.
5. Connect your network
Connect the AV receiver to your home network via Ethernet (preferred) or Wi-Fi for firmware updates, streaming, and app control.
Step 6 - Run Room Calibration
This is the most important step that most first-time buyers skip. Without calibration, even an excellent system will not sound its best.
Most AV receivers include an automatic room calibration system. Denon uses Audyssey MultEQ. Yamaha uses YPAO. These systems work by measuring how sound arrives at your listening position using a calibration microphone, then automatically correcting speaker levels, distances, and frequency response.
How to run Audyssey calibration on a Denon receiver:
-
Place the included calibration microphone at your main listening position at seated ear height
-
From the receiver's setup menu, launch Audyssey MultEQ
-
The system will play test tones through each speaker and measure the results
-
It will prompt you to move the microphone to several positions around your listening area
-
Once complete, Audyssey applies corrections automatically
-
Do not skip this step - it makes a clearly audible difference
For a Dolby Atmos home theater system specifically, ensure Dolby Atmos is selected in the receiver's audio decoding settings after calibration is complete.
Step 7 - Set Up Your Display
Once your audio system is running correctly, configure your TV or projector:
-
Set your TV's picture mode to match your content (Cinema or Movie mode for films, Standard for TV)
-
Enable HDR if your TV and source support it
-
Ensure HDMI ARC or eARC is enabled in your TV's settings if you use the TV's apps (Netflix, Prime Video, etc.) and want that audio to pass through to your receiver
-
Disable the TV's internal speakers - once your AV system is running, you do not want audio coming from two sources simultaneously
Step 8 - Optimize for Dolby Atmos
If your system supports a Dolby Atmos home theater system, a few additional steps will ensure you are getting the full Atmos experience:
-
In your AV receiver's settings, confirm Dolby Atmos is active and not just Dolby TrueHD
-
Ensure your source content is Atmos-encoded - not all 4K Blu-rays are. Check the disc packaging for the Dolby Atmos logo
-
For streaming, Netflix and Disney+ both offer Atmos content, but you need a compatible plan (Netflix Premium) and a compatible app on your device
-
On a Denon receiver, Audyssey will have already set speaker distances and levels - verify the height speaker settings are correctly identified as ceiling or overhead, not front or surround
Recommended Products for Your Home Theatre Setup
AV Receivers
Denon AVR-X1800H - 7.2 Channel 8K AV Receiver
The ideal home theater audio receiver for a first proper setup. Seven channels of amplification at 80W per channel, full Dolby Atmos and DTS:X decoding, Audyssey MultEQ XT room calibration, six HDMI inputs with 8K support, and HEOS Built-in for multi-room audio. A complete, capable receiver for 5.1 and 7.1 systems.
Denon AVR-X2800H - 7.2 Channel 8K AV Receiver
Steps up to 95W per channel with three HDMI 2.1 inputs supporting 8K/60Hz and 4K/120Hz with VRR and ALLM for gaming. Eight HDMI inputs total and Audyssey MultEQ XT room calibration. The best sound system for home theater buyers who want HDMI 2.1 capability and more power for larger rooms.
Denon AVC-X3800H - 9.4 Channel AV Controller with Dolby Atmos
The most capable receiver in the Denon lineup at this tier. Nine channels at 105W each, full Dolby Atmos, DTS:X, IMAX Enhanced, and Auro-3D support for a complete Dolby Atmos home theater system. HDMI 2.1, Audyssey MultEQ XT, HEOS, and Dirac Live compatibility. Purpose-built for dedicated cinema rooms.
Common Home Theatre Setup Mistakes to Avoid
Not running room calibration
The single most common mistake. Skipping Audyssey or YPAO calibration leaves speaker levels unbalanced, distances incorrectly set, and frequency response unoptimized. It takes 15 minutes and makes a significant difference.
Placing the subwoofer in a corner automatically
Corner placement increases bass output but often creates an uneven, boomy low end. Start with the subwoofer along the front wall and adjust after calibration.
Running speaker cables at incorrect polarity
Reversed polarity on even one speaker causes phase cancellation - bass disappears and imaging collapses. Double-check every terminal before powering on.
Connecting source devices directly to the TV instead of the receiver
Your gaming console, Blu-ray player, and streaming device should all connect to the AV receiver - not the TV. This ensures all audio is processed through your system properly. Connect only the receiver's HDMI output to the TV.
Using standard HDMI cables for 4K or 8K sources
Standard high-speed HDMI cables cannot carry 4K/120Hz or 8K/60Hz signals reliably. Use Ultra High Speed HDMI cables (48 Gbps rated) for all connections in a modern home theatre setup.
Not enabling HDMI ARC on the TV
If you use Netflix or other apps built into your TV, HDMI ARC (or eARC) is required to pass the audio from the TV back to your AV receiver. Without it, you will hear audio from the TV's internal speakers rather than your surround system.
Frequently Asked Questions
What is the best way to start a home theatre setup?
Start with the room, then the AV receiver, then speakers. The room determines what speaker configuration makes sense. The receiver determines how many speakers you can connect. Then choose speakers that match both.
Do I need a Dolby Atmos home theatre system?
If you have a room above 200 square feet and a budget that allows for a 7.1.2 or larger setup, Dolby Atmos significantly improves the home theatre experience - particularly for action films, film scores, and nature documentaries. For smaller rooms or tighter budgets, a 5.1 system delivers excellent results.
What is the difference between 5.1 and 7.1 surround sound?
A 5.1 system uses five speakers (front left, centre, front right, two surrounds) and one subwoofer. A 7.1 system adds two rear surround speakers behind the listening position, creating a more enveloping sound field. For rooms under 250 square feet, 5.1 is usually sufficient.
How important is the home theater audio receiver?
It is the most critical component in the system. The AV receiver determines which audio formats you can decode, how many speakers you can connect, what resolution of video passes through, and how well your room is calibrated. Underspending on the receiver to save budget for speakers is a common mistake.
Can I connect a home theatre system to a smart TV?
Yes. Connect all your source devices to the AV receiver and the receiver's HDMI output to your smart TV's HDMI input. Enable HDMI ARC or eARC on the TV so audio from the TV's built-in apps also passes through your home theatre system.
What is Audyssey, and why does it matter?
Audyssey MultEQ is an automatic room calibration system built into Denon AV receivers. It measures how sound arrives at your listening position and applies corrections to speaker levels, distances, and frequency response. Without calibration, your system will not sound as intended. With calibration, even an average room can produce excellent sound.
How much should I spend on a home theatre system?
There is no fixed answer, but a useful starting point is to allocate roughly 40% of your budget to the AV receiver, 40% to speakers, and 20% to accessories and cables. A total budget of Rs. 1,00,000 to Rs. 2,00,000 can produce an excellent 5.1 system. Rs. 2,50,000 and above opens up 7.1.2 Atmos setups with premium components.
Do I need a subwoofer if I have floorstanding speakers?
Not necessarily for music. Floorstanding speakers typically extend low enough for music listening without assistance. For home theatre use, even good floorstanding speakers benefit from a dedicated subwoofer for the deepest bass frequencies in film soundtracks.
Conclusion
A properly set up home theatre system is one of the most rewarding things you can have in your home. The difference between a system that has been correctly placed, connected, and calibrated - and one that has not is dramatic, even when the equipment is identical.
Follow these steps in order: choose your room, choose your components, plan placement before mounting anything, run cables cleanly, connect in the correct sequence, and always run room calibration before you make any judgements about sound quality.
The result, done right, is the best sound system for home theater that genuinely transforms the way you watch films, listen to music, and experience any content you love.
Ready to Build Your Home Theatre?
The right equipment makes all the difference - but so does the right advice. Melody House stocks the complete Denon AV receiver lineup alongside speakers, subwoofers, projectors, and everything else you need for a complete home theatre setup.
If you know what you want, you can browse and order at melodyhouse.in. If you are not sure where to start, the Melody House team at Sector 35, Chandigarh, can walk you through the options based on your specific room, budget, and goals.
Start your home theatre journey at Melody House
Related post


08
Oct


